Pencil Drawing for Beginners: A 7-Step Starter Guide
Short answer: learn pencil drawing in this order — line control, then value, then edges, then detail. Draw long lines from the shoulder instead of the wrist, build a five-step value scale and shade a sphere until the light turns gradually, then practise keeping contact shadows sharp and form shadows soft. Fifteen to twenty-five minutes a day on scrap paper beats one long session a week. This guide walks through seven steps in that order, a first still-life project you can finish in about 45 minutes, the six mistakes that stall most beginners, and a four-week practice plan.
Why most beginners stall in the second week
Almost nobody quits because drawing is too hard. People quit because they started in the wrong order. They copy a finished sketch line by line, the proportions drift, the shading turns grey and muddy, and there is no obvious reason why. The drawing looks wrong but the mistake happened three stages earlier.
Pencil drawing is built from three separate skills, and each one has to be practised on its own before they are combined:
- Line control — putting the graphite exactly where you intended, at the width and pressure you intended.
- Value control — separating light from shadow into clear steps instead of one flat grey.
- Edge control — deciding where a boundary should be crisp and where it should dissolve.
If you practise all three at once on a complicated subject, you cannot tell which one failed. The seven steps below isolate them first and combine them at the end. If you already know which grade of pencil to buy, our pencil grades guide explains the H-to-B scale in detail; this article only covers the three grades a beginner actually needs.
Step 0: the kit that is actually enough
A beginner does not need a 50-piece set to learn. You need three grades, one eraser you can shape, and paper with enough tooth to hold graphite. Everything else is convenience.
| Item | What to use | Why it matters at this stage |
|---|---|---|
| Pencils | One HB, one 2B, one 6B. Add a 4B later if you like mid-tones. | HB blocks in and holds light lines; 2B carries most of the shading; 6B supplies the darkest accents. Three grades cover the full value range you need. |
| Paper | Drawing paper around 120–180 gsm with visible tooth. Avoid smooth printer paper. | Graphite sits on the paper's tooth. A smooth sheet fills up after two layers and the drawing turns shiny and flat. |
| Eraser | One kneaded eraser plus one firm vinyl eraser. | The kneaded eraser lifts graphite without damaging the surface; the vinyl eraser is for clean edges and for drawing light back in. |
| Sharpener | A blade sharpener or a craft knife plus sandpaper. | A long, exposed graphite point shades more evenly than a short one, and it lets you use the side of the lead. |
| Blending tool | A paper stump. A tissue works as a substitute. | Stumps blend without oil. Fingers transfer skin oil and make graphite look greasy. |
Two extras worth having on the desk: a scrap sheet for warm-ups and a sheet of tracing paper to rest your hand on so you do not smear finished areas. A drawing board or a hardback sketchbook is enough support; the paper only needs to stay flat.
Step 1: hold the pencil three ways
Grip decides what kind of mark you can make. Beginners usually learn one grip and then fight it for every task.
Tripod grip — for detail and controlled lines
Pencil rests against the side of the middle finger, held between thumb and index finger, about 3–4 cm from the tip. Wrist stays on the paper. This is the grip for eyes, edges, small ellipses and any line under 5 cm. Pressure comes from the fingers, so keep it light.
Extended or overhand grip — for blocking in
Hold the pencil further back, almost like a conductor's baton, and let the hand hover above the paper. The point of contact is the side of the lead, not the tip. Movement comes from the elbow and shoulder. This produces long, straight, light lines — exactly what the first stage of a drawing needs.
Underhand grip — for broad shading
Pencil lies almost flat against the paper, held near the unsharpened end. The lead's side lays down a wide, even band of graphite. Use this when filling a large shadow area; it keeps the surface from getting scratched by the tip.
A practical rule: step back one grip for every increase in scale. Small details use the tripod, medium shapes use the extended grip, large areas use the underhand grip. If your lines keep curving, the problem is usually that you are drawing a 20 cm line with your fingers.
Step 2: five warm-up drills before every session
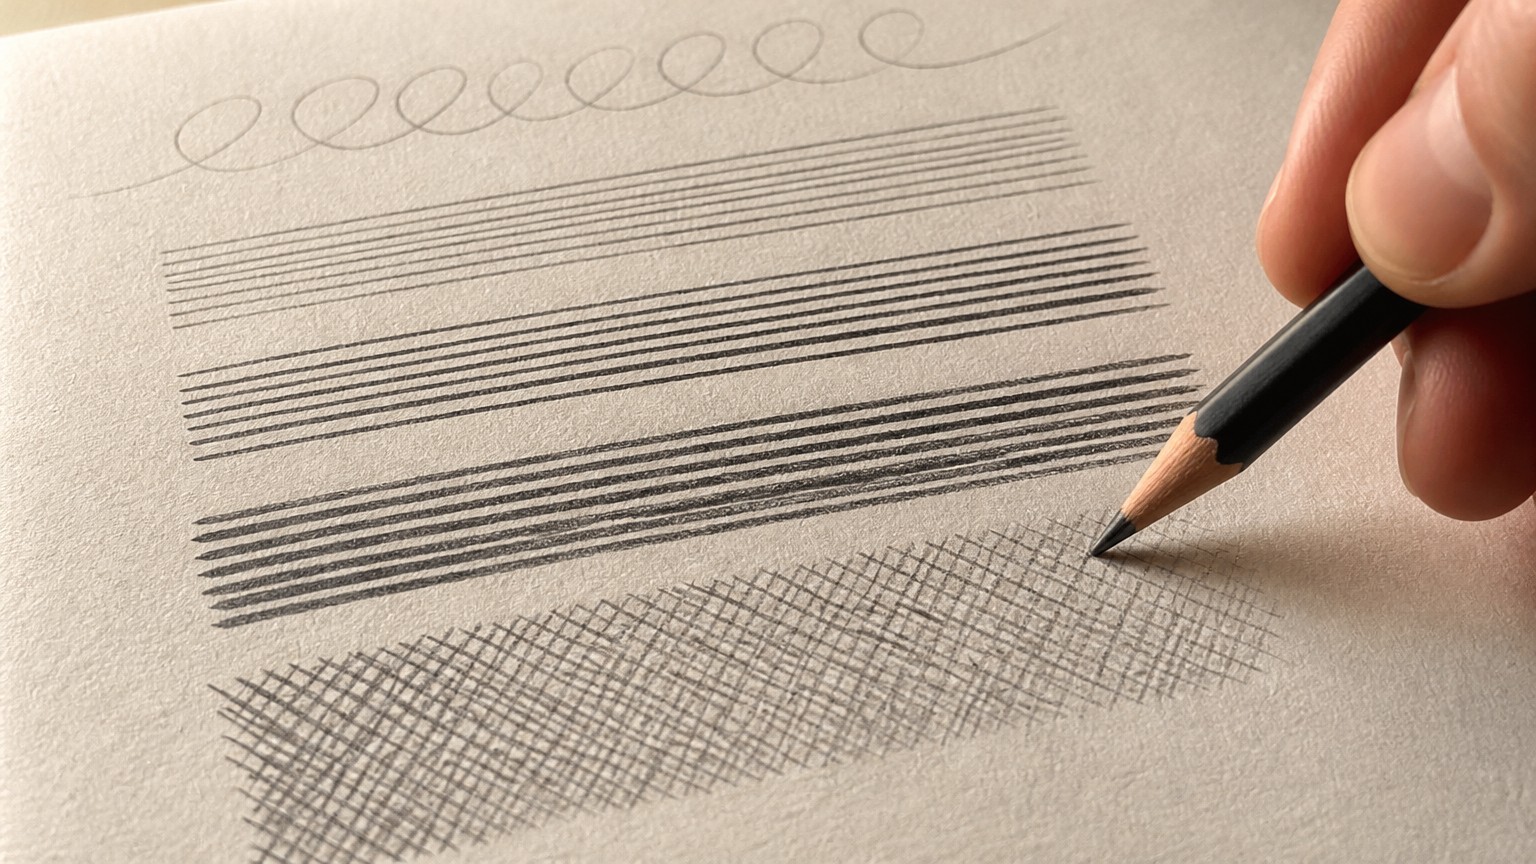
Do these on scrap paper for five minutes. They are not art; they are calibration.
- Loops (60 seconds). Draw continuous overlapping circles without lifting the pencil. Aim for even speed, not even size. This loosens the shoulder.
- Parallel lines (90 seconds). Fill a 10 cm square with straight lines, all the same angle, spaced evenly. Then repeat at a second angle. Even spacing matters more than speed.
- Pressure ramp (60 seconds). Draw one line and increase pressure from barely visible to your darkest in a single pass, then reverse. This teaches you that one pencil can produce a whole value range.
- Cross-hatching (60 seconds). Overlay a second set of lines at roughly 45° to the first. Keep the crossings diamond-shaped rather than square.
- Ellipses (60 seconds). Draw stacked ellipses inside a rectangle, keeping the long axis vertical. This is the drill that fixes most cup, bowl and cylinder problems later.
Warm-ups also expose the day's problem early. If your lines wobble badly on scrap paper, they will wobble on the drawing, and you can adjust your grip before you commit to a subject.
Step 3: build a five-step value scale, then shade a sphere
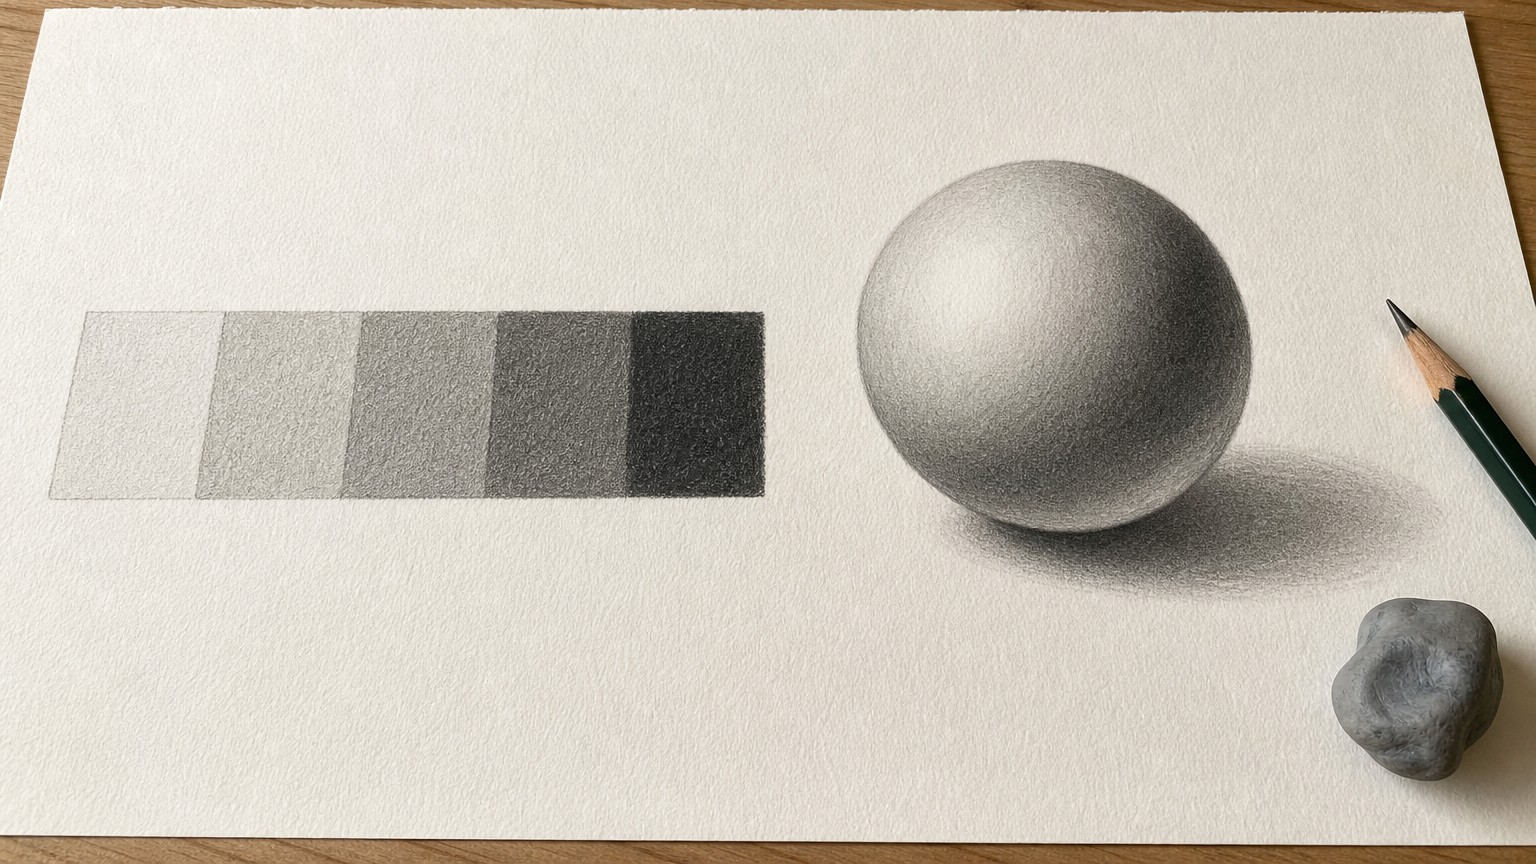
Value is the single skill that makes a drawing read as three-dimensional. Shading randomly produces grey; shading in planned steps produces form.
The scale
Draw five 3 cm squares in a row. Fill the first with your lightest usable tone (not white — the paper is your white), then step darker in even jumps until the last square is your darkest 6B layer. Do not guess the middle: judge each square against its neighbours, not against your memory.
Most beginners produce a scale where four squares are almost identical and one is very dark. That is the same compression that makes their finished drawings look flat. Squinting at the row is the fastest test — if the tonal jumps disappear when you squint, they are too small.
The sphere
Draw a circle, then map four zones before you shade anything:
- Highlight — where the light hits most directly. Leave the paper bare.
- Mid-tone — the general body of the sphere. This is where the 2B does most of the work.
- Core shadow — the darkest band on the sphere, just before the shadow turns away from you. It is not at the outline.
- Reflected light — a slightly lighter band inside the shadow, bounced from the table surface. It must stay darker than the mid-tone, or the sphere will look like it is glowing.
Add an elliptical cast shadow on the table, darker where it touches the sphere and softer as it moves away. Keep the transition from mid-tone into core shadow gradual, and the edge of the cast shadow crisp at the contact point. Getting one sphere right teaches more about value than ten copied portraits.
Step 4: block in before you draw anything
Block-in is the stage that prevents the second-week collapse. It means finding proportion and placement with light lines, before any detail or dark tone.
- Envelope. With the extended grip, draw the simplest possible polygon that would contain the whole subject. Every mark stays under light pressure.
- Big divisions. Cut the envelope at the widest and narrowest points, and at the tallest and shortest. Check the ratio of height to width by holding the pencil at arm's length, thumb marking one dimension, and comparing it to the other from the same distance.
- Angles. Hold the pencil up to each major edge, then transfer that angle to the paper as a straight line. Angles are easier to judge than curves.
- Straight-line curves. Build curved contours from three or four straight segments joined at slight angles. Do not smooth them yet. A curve drawn in one motion without landmarks will be wrong and hard to correct.
Only when the block-in looks right should you commit to a darker line. Keep a light hand: a block-in you can barely see is a block-in you can still change.
Step 5: layer light to dark, never dark to light
Graphite is translucent. Each layer sits on top of the previous one, so a dark layer applied first cannot be lightened without erasing. Work in three passes:
- Pass one — family tone. With the underhand grip and a 2B, give every shadow area the same light base tone, using the side of the lead. Leave all lit areas untouched.
- Pass two — separate the values. Deepen the core shadows and the darkest accents with the same 2B, then add 6B only where the subject needs the darkest note. Do not press hard; add layers instead of pressure.
- Pass three — accents and refinement. Sharpen contact points, add reflected light by lifting graphite with the kneaded eraser, and re-state any edge that got lost.
If the paper starts to look shiny, stop. That shine is burnished graphite — the tooth is full, and no further layer will take. Either accept the value you have or lift some graphite with the kneaded eraser before continuing.
Step 6: blend selectively, then restate the edges
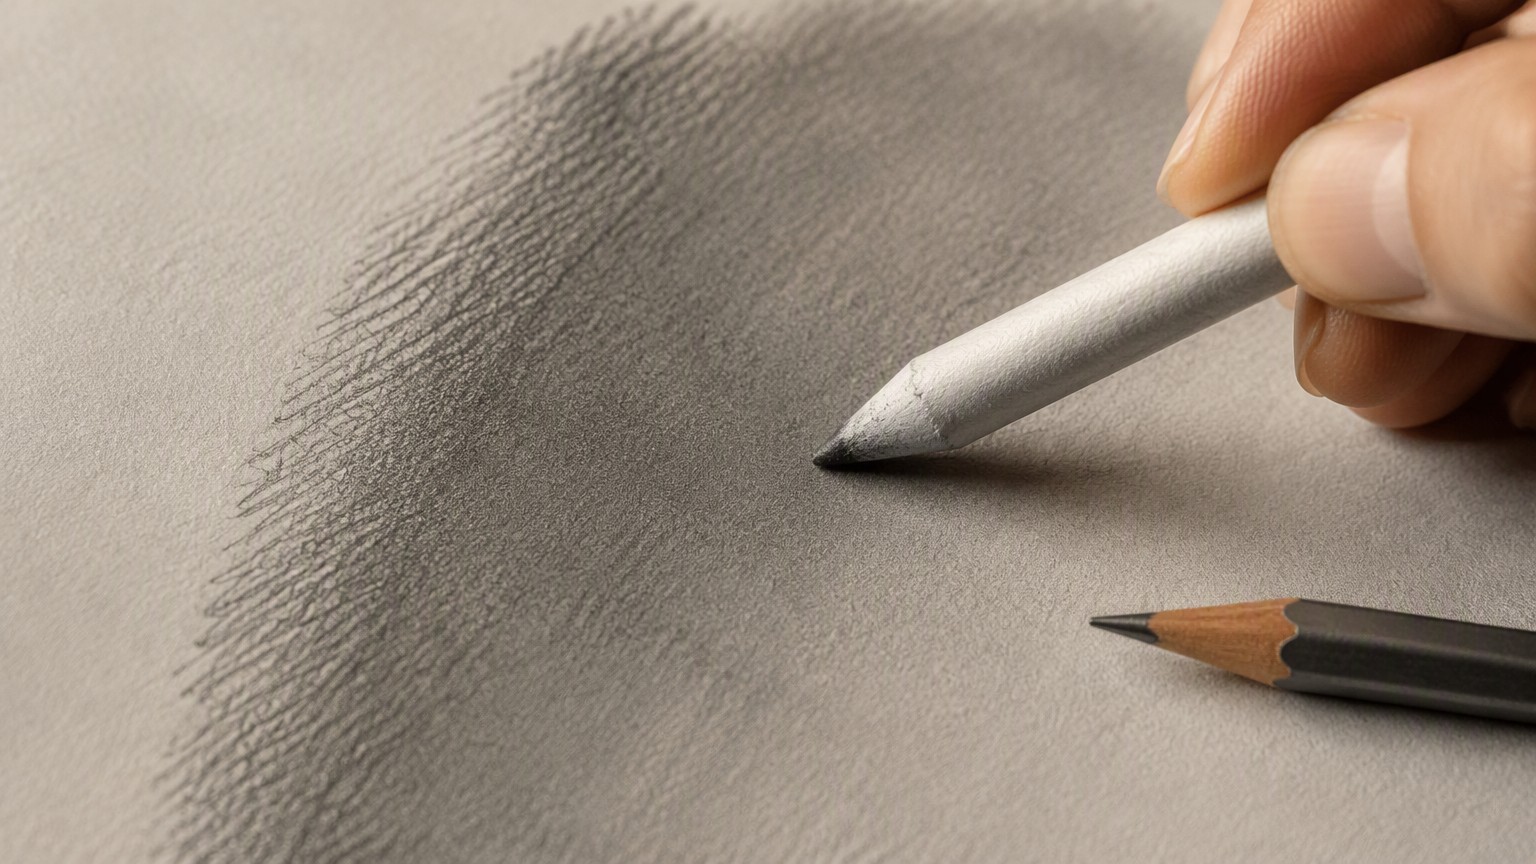
Blending is not a finishing step you apply everywhere. Pressing a stump over the whole drawing destroys the tooth structure and turns everything into an even, airbrushed grey with no material feel.
- Blend transitions, not surfaces. Run the stump along the boundary between two values so the jump softens. Leave flat mid-tones hatched.
- Never blend a highlight. Blending drags graphite into the lightest area and kills the brightest value you have.
- Re-state after blending. Blending lowers contrast. Go back with a sharpened 2B or 6B and re-draw the darkest accents and the contact shadows. Almost every drawing needs this pass.
- Use the eraser as a drawing tool. A kneaded eraser pulled to a point lifts graphite for reflected light, highlights and texture. It is faster and cleaner than trying to shade around a light area.
Step 7: control edges — the last 10 percent that reads as skill
Edges communicate what a surface is made of. A single drawing usually needs three kinds:
- Hard edges at contact shadows and cast-shadow cores, where two surfaces touch or a shadow starts abruptly. Draw them with the tripod grip and a sharpened 2B.
- Soft edges where a form turns away from the light. These come from a gradient, not a line, so build them with layered tone or a light stump pass.
- Lost edges where the subject merges into the shadow behind it, deliberately left without a boundary. Leaving one or two edges lost makes the drawing feel observed rather than outlined.
The common beginner error is to outline everything at the same weight. That uniform line is what makes an otherwise careful drawing look like a colouring book. Match the edge to the physics of the subject, and the same amount of shading suddenly reads as solid.
A first project you can finish in about 45 minutes: pear and cup
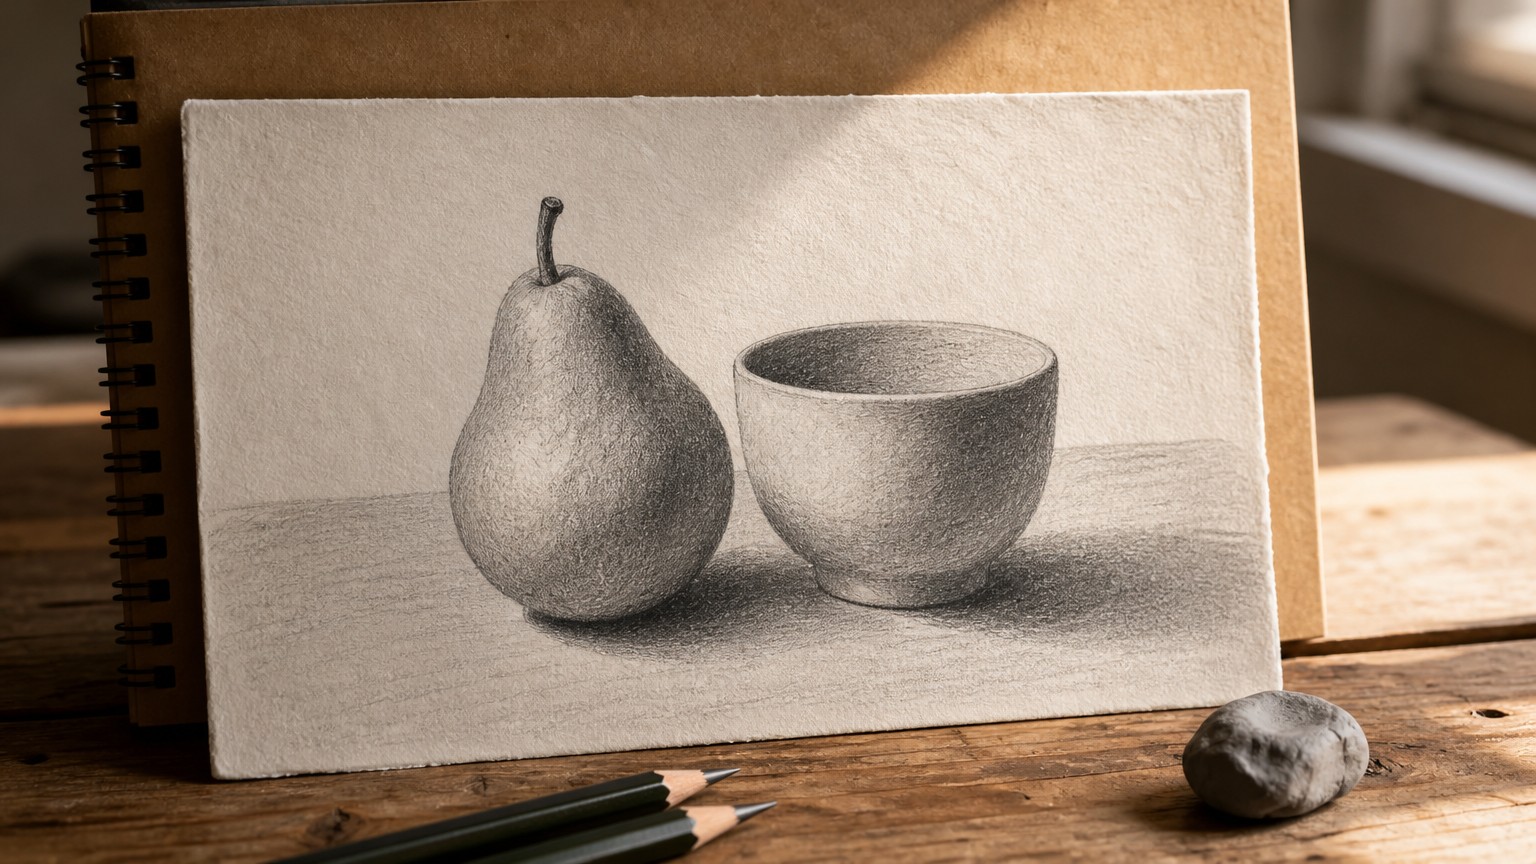
This is a deliberately simple still life with two different surface types — an organic form and a hard cylinder — so you practise both.
Setup (5 minutes)
Put a pear and a plain cup on a table near a window, so the light comes from one side only. Sit so that you see the cup slightly from above; that gives you a visible ellipse. Fix your position and do not move during the drawing — a change in viewpoint breaks every measurement you took.
Block-in (10 minutes)
Envelope both objects together as one shape, then divide: the pear's widest point, the cup's rim ellipse, the shared ground line where both objects meet the table. Check the gap between the two objects against the cup's height. Leave the whole block-in light.
Shadow map (10 minutes)
Before shading, mark the boundary of every shadow: the pear's core shadow, the inside of the cup, the shadow the pear casts on the table, and the shadow the cup casts. Everything inside those boundaries gets tone; everything outside stays paper. This one step is the difference between a drawing that looks lit and one that looks tinted.
Tone (15 minutes)
Even base tone in all shadow areas with the underhand grip and 2B. Then separate values: the cup's interior and the pear's core shadow are darker than the table shadow. Add 6B accents where the objects touch the table. Keep the pear's highlight completely clean.
Refine (5 minutes)
Blend only the transitions on the pear, then re-state the cast-shadow cores with a sharpened 2B. Lift a thin band of reflected light inside the pear's shadow with the kneaded eraser. Finally, decide one edge to lose — usually where the cup's shadow meets the background without a clear boundary.
Six mistakes that keep beginners stuck, and the fix for each
| What you see | What is actually happening | The fix |
|---|---|---|
| Shading looks scratchy and uneven | The tip is doing all the work at one pressure, so every stroke shows as a line | Switch to the side of the lead for base tone, and build two or three lighter layers instead of one heavy one |
| Drawing looks flat and grey | Values are compressed — everything sits between mid-grey and dark | Leave the paper bare for the lightest value, deepen only the core shadow and contact accents, and squint to check the jump between values |
| Proportions drift as you add detail | Detail was drawn before the block-in was verified | Return to the envelope stage, measure height against width with the pencil at arm's length, and correct angles before any tone goes down |
| Everything is outlined | Every edge was drawn at the same weight, so nothing turns | Delete the outline inside the subject, rebuild the turn with tone, and keep hard lines only at contact shadows |
| Tone looks greasy and refuses new layers | Fingers transferred oil, or the tooth is burnished | Use a stump or tissue, lift the greasy layer with a kneaded eraser, and never press hard enough to polish the paper |
| Paper greys out across the whole sheet | The hand is resting on finished areas | Rest on tracing paper, work from top-left to bottom-right if you are right-handed, and keep the heel of the hand off the paper |
A four-week practice plan
Short, frequent sessions beat long infrequent ones because value judgement improves with repetition, not duration.
- Week 1 — line only. Fifteen minutes a day: loops, parallel lines, pressure ramps, ellipses. No finished drawing. The goal is a stroke that goes where you intend.
- Week 2 — value only. Twenty minutes a day: one five-step scale, then one sphere with cast shadow. Vary the light direction every second day. The goal is a clean jump between five distinct values.
- Week 3 — block-in. Twenty minutes a day: envelope and straight-line block-ins of ordinary objects — a mug, a shoe, a chair — with no shading at all. The goal is proportion that holds up when you check it against the subject.
- Week 4 — combine. Two sessions of the pear-and-cup project, then repeat it with a new object next to the cup. Keep every session within 45 minutes so you stop while your judgement is still fresh.
Keep the week 1 and week 2 sheets. Comparing them after a month is the most reliable evidence you have that the method is working.
Frequently asked questions
What pencils do I actually need to start pencil drawing?
An HB, a 2B and a 6B, plus a kneaded eraser and paper with visible tooth. That covers the full value range a beginner drawing needs. A larger set is useful later for convenience and for travelling, not for learning faster.
How long does it take before my drawings look good?
People who practise 15–25 minutes a day usually see a clear change in line control within two to three weeks, and in value within a month. The limiting factor is usually whether the three skills are practised separately, not talent. No fixed timeline applies to everyone.
Should I blend with my finger?
No. Skin oil binds the graphite into a greasy film that resists new layers and photographs badly. Use a paper stump or a tissue, and blend only the transitions rather than whole surfaces.
Why does my shading turn shiny?
You have burnished the paper — the tooth is full of graphite and the surface is polished. Add layers with lighter pressure and a softer touch, and lift some graphite with a kneaded eraser if you still need to go darker in that area.
Sketch pencil sets for classrooms, studios and private label
H&B Art manufactures graphite sketch pencil sets for wholesale and OEM programmes. If you are equipping a class, a studio or a retail line, these three formats cover the most common briefs.
Browse the full range in the Sketch Pencil category, or see paper and sketchbooks for the surface side of the kit.